How to Document Finds with Photos, Notes, and Context
Good find records are worth more than the finds. Here is how to photograph, note, and contextualise your detecting finds — and why not to over-clean them.
Updated
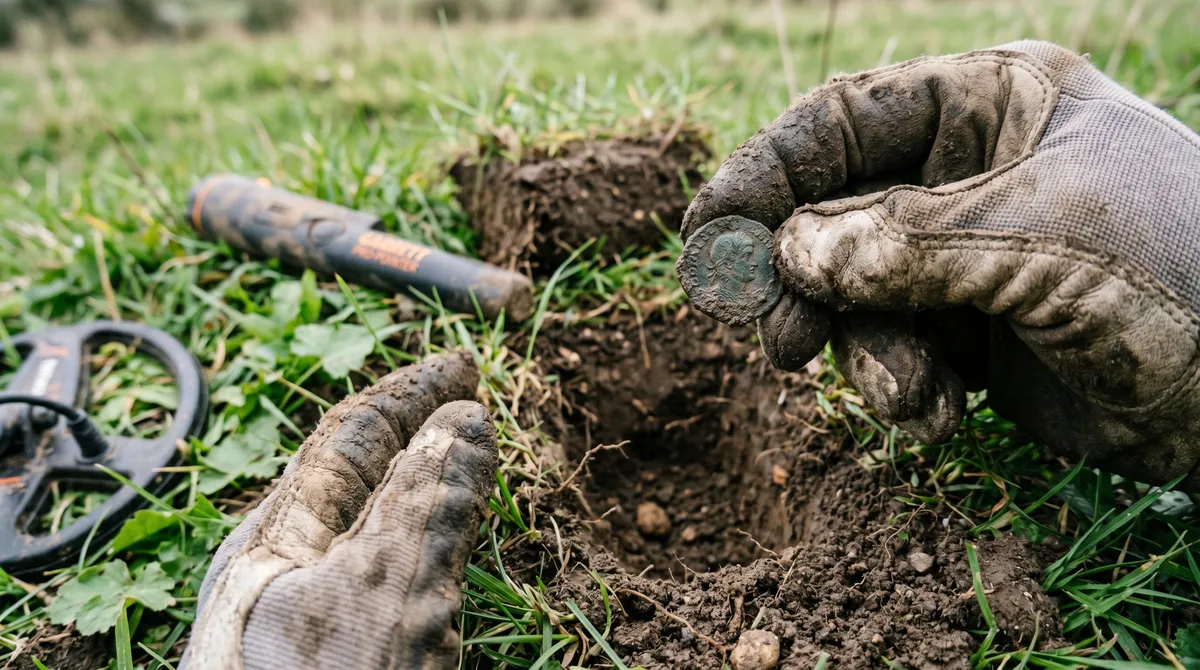
Pull a coin from the ground, glance at it, drop it in your pouch, and move on — and you’ve just thrown away most of its value. Not the coin’s value. The information’s value. The story of a find — where, how deep, in what soil, under what settings — is often worth more than the object itself. And it vanishes the moment you stop paying attention.
Here’s how to document finds so they keep paying you back.
Photograph it twice
The single best habit is two photos: one in the field, one after.
- In situ, in the field. Snap it in the hole or in your hand with the soil still on, right where you found it. This shot captures context — the ground, the depth, the moment — that you can never recreate later.
- Cleaned up, at home. Once it’s safely rinsed, take a clearer photo in good light against a plain background for identification and your records.
The field shot is the one most people skip and later wish they had. Take it first, every time.
Getting the field shot right
It takes ten seconds and there are three things worth doing deliberately.
Shoot it in the hole before you lift it. Once the object is out, the relationship between find and ground is gone. A photograph showing the object still seated in the soil face, with the plug beside it, records the depth and orientation in a way no written note quite manages.
Get your shadow out of the frame. The commonest ruined field photo is one taken with the sun behind you and your own silhouette across the hole. Turn ninety degrees, or crouch so the light comes across the object rather than over your shoulder.
Include something for scale. Your fingertip beside the object will do at a pinch, and it is enormously better than nothing. A small object photographed alone against soil is genuinely ambiguous — a button, a coin, and a lead weight can look identical.
And check the frame before you move on. A blurry photograph of the moment is worth very little, and you cannot go back.
The record shot at home
The second photograph is the one that does the work later — for identification, for insurance, for showing a specialist.
Use a plain, neutral background. Grey or off-white card is ideal. Avoid patterned surfaces, newspaper, and anything shiny.
Use soft, indirect daylight. A window on an overcast day is close to perfect. Direct sun and on-camera flash both blow out surface detail and hide exactly the features that identify an object.
Photograph both sides. Every time, without exception. Detail on the reverse frequently carries the identification, and a single-sided photograph is often useless for dating.
Include a proper scale. A small ruler in frame is the standard, because it makes measurement possible from the photograph alone rather than requiring a written note that may drift away from the image.
Shoot straight down. An angled photograph distorts proportions and makes comparison against reference images unreliable.
Try raking light for worn detail. Light coming across the surface at a low angle throws faint lettering and decoration into relief in a way flat light cannot. On a worn coin this can be the difference between illegible and readable — a technique our guide to identifying an old coin leans on heavily.
Measure and weigh it
A photograph is not a measurement, and both are cheap to capture.
Diameter, or length and width, in millimetres. A cheap pair of digital callipers costs very little and makes this trivial, but a steel rule works.
Weight, in grams. A small kitchen or jeweller’s scale is enough. For coins in particular, weight is frequently diagnostic — it can separate denominations and periods that look identical in a photograph.
Thickness, where it varies meaningfully.
None of this is fussy antiquarianism. These are the first three questions anyone identifying your find will ask, and having the answers already recorded turns a long email exchange into a short one.
Don’t over-clean — you can’t undo it
This matters enough to slow down for: aggressive cleaning can ruin a find. Scrubbing, polishing, and harsh chemicals strip away patina and surface detail, which can wreck both the value and your ability to identify what you’ve got. An old coin’s grime might be hiding the very detail that dates it.
So go gentle. Rinse off loose soil, pat it dry, photograph it, and research before you do anything more. If it looks old or unusual, leave it as-is and get an expert opinion. You can always clean it later. You can’t un-clean it.
Record the context that matters
A photo’s better with the details around it. For each find worth logging, capture:
- Depth — surprisingly revealing over time, and central to your keeper-rate patterns.
- VDI reading — what your detector showed before the dig, per the VDI guide.
- Soil and conditions — they explain a lot about why a find read the way it did.
- Detector settings — the snapshot that produced it.
- Orientation — whether it lay flat, on edge, or at an angle. This explains a great many odd VDI readings after the fact.
- Notes — anything the fields don’t capture. “On its edge.” “Right against a nail.”
Tie that to a GPS pin and you’ve got a complete, private record of the find and everything around it.
Associations are the detail people throw away
If two or three objects come out of the same small area, record that they came out together. This is the single most under-appreciated piece of information a detectorist can capture.
A scatter of related material tells a story that no individual object does: a group of coins may be a dispersed hoard, a cluster of buttons and buckles may mark a building, and a spread of lead may mark where something was worked. Once the objects are separated into a pouch and then into a drawer, that relationship is gone permanently and no amount of later study recovers it.
You are the only person who will ever know those pieces were found within a few metres of each other. Write it down while it is still true.
Even “boring” finds are worth it
It’s tempting to only document the exciting stuff. Resist that. The clad coins, buttons, and unremarkable bits are your dataset — they teach you what your signals and settings really mean. The patterns that make you better come from volume, not rarity. Skip the ordinary finds and you starve the very analysis that improves your hunting.
Keep it organised as it grows
Two years in, an undifferentiated pile of photographs and a drawer of unlabelled objects is a common and entirely avoidable outcome.
Keep the object and its record connected. Small resealable bags with a reference number, or individual compartments in a tray, both work. The failure mode is a box of interesting things nobody can say anything about.
Give finds a consistent identifier — a simple sequence, or date-plus-number. It does not matter what scheme you use as long as it is the same one every time.
Store by find, not by folder of photos. A camera roll with four hundred detecting pictures in date order is not a record. Label each photograph with the find it shows — the reference number in the file name is enough — so it stays linked to that find’s depth, VDI and location. That link is what keeps the story together.
What a specialist will want
If a find turns out to be significant, someone else will need to look at it. Everything above happens to be exactly what they need.
A Finds Liaison Officer, a museum curator, or a heritage officer will ask for the findspot, the depth, both sides photographed with a scale, the dimensions and weight, and whether anything else came out nearby. If you captured that at the hole, the conversation is a five-minute read-out. If you did not, it becomes a series of apologetic guesses.
Crucially, they will also want it uncleaned. Our guide to recording finds with the PAS covers what that process actually looks like, and cleaning finds without ruining them covers what is safe to do yourself before anyone sees it.
Keep the story with the find
This is what DetectingLog is built for. Each find keeps its type, metal, VDI, depth and keeper status, and the hunt it came from carries the GPS pin, your detector settings, your notes and your photos — one photo per hunt on the free tier, up to 12 on Premium. So the story stays together instead of scattering across your camera roll and your memory. Premium adds optional cloud backup, so your records follow you across devices, and all of it stays private by default.
A find is a moment. A documented find is a record you’ll still be learning from years later.
Frequently asked questions
How should I photograph my metal detecting finds?
Take a shot in the field as you find it — in the hole or in hand, with the soil still on — then a cleaner photo later once it's safely rinsed. Good light and a plain background help. The in-situ shot captures context you can never recreate.
Should I clean coins and relics before identifying them?
Be careful. Aggressive cleaning can destroy detail, patina, and value, and it can make a find harder to identify. Rinse gently to remove loose soil, photograph it, and research before doing anything more. When in doubt, leave it and ask an expert.
How do I include a scale in a find photo?
Put something of known size in the frame beside the object — a small ruler is ideal, a coin of known diameter works, and a fingertip is better than nothing. Without a scale reference, a photograph of a small object is genuinely ambiguous and much harder for anyone to identify from.
Why record context for ordinary finds?
Because "ordinary" finds are data. The depth, location, soil, and settings behind a clad coin all feed the patterns that make you a better detectorist. Recording context turns every find — not just the rare ones — into something useful later.
Keep reading
Metal Detecting Data: Spot Patterns Across Your Hunts
Finds per hunt, keeper rate, top locations, VDI distribution, depth bands — here is how simple stats reveal patterns your memory would miss.
How GPS Pins Help You Remember Productive Sites
Your memory loses your best detecting spots. Here is how GPS pins help you revisit productive ground — without exposing your sites to anyone else.
What to Record in a Metal Detecting Logbook
A good detecting log is a learning system, not a diary. Here is exactly what to record on every hunt so patterns and better finds follow.