Pinpointers: Why They Matter and How to Use One
A pinpointer is the highest-value accessory in detecting. What it does, how to use one properly, what to look for when buying, and the habits that make it pay.
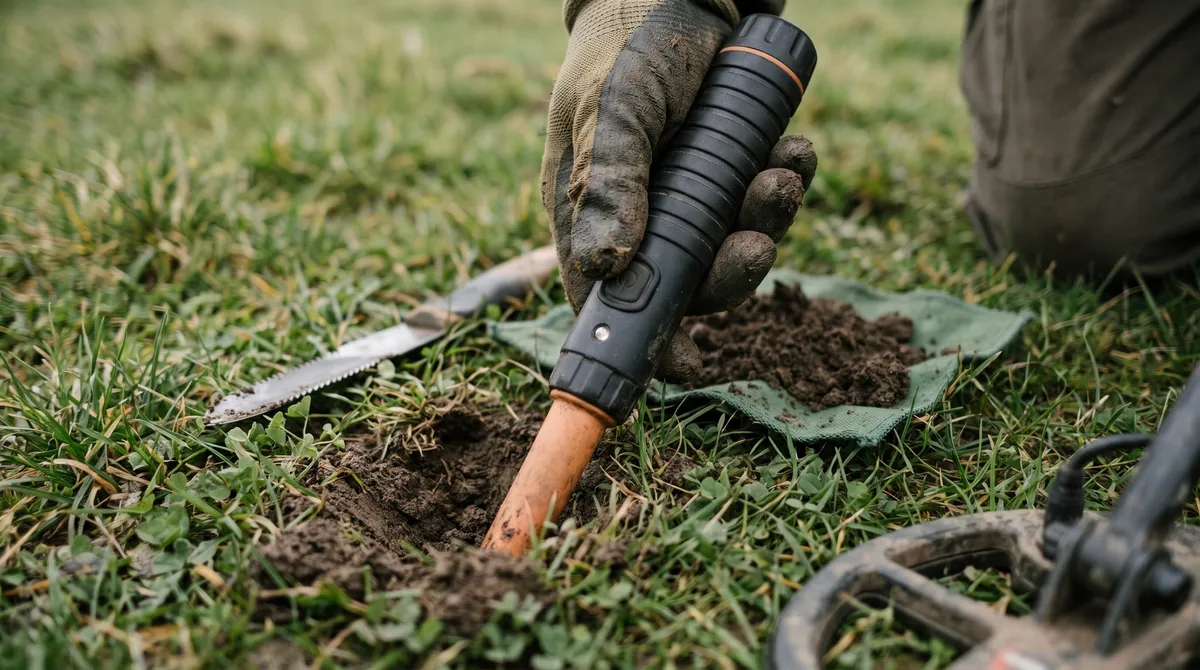
Ask an experienced detectorist which single piece of kit they would replace first if it broke, and a surprising number will not name their detector. They will name a fifty-dollar orange stick.
The pinpointer is the highest-value accessory in the hobby, and it is the one beginners most consistently skip — usually because the budget went entirely on the machine. That is a mistake worth correcting early, because the pinpointer affects how many finds you actually recover far more than the last hundred dollars of detector does. Our buying guide makes this argument in passing; this article is the long version.
What it actually does
A pinpointer is a short-range metal detector in a handheld probe. It has no ability to search ground — its range is measured in centimetres — and that is the entire point.
Your detector gets you to within a rough circle. Somewhere in that circle, at some depth, is a target. Without a pinpointer you find it by removing soil and re-swinging, repeatedly, gradually widening the hole until either the target appears or you give up. With one, you dig once, put the probe in the hole, and it tells you which wall the target is behind.
The difference in practice is stark: recovery time drops from minutes to seconds. That has three consequences that all compound.
You dig more targets per session. If recovery takes four minutes instead of forty seconds, a four-hour hunt covers a fraction of the ground. Over a season this is the difference between hundreds of targets and thousands.
You lose fewer finds. Small targets — thin hammered coins, tiny gold, shot — vanish into loose soil and are genuinely hard to find by eye. Plenty of good finds have been thrown back into the hole by people who never knew they had them.
You do less damage. A neat plug lifted once and put straight back is the difference between a landowner who welcomes you next season and one who does not. Enormous ragged holes are how permissions get lost, and the pinpointer is what keeps holes small.
Using one properly
Most people work this out eventually. Getting there in the first week is better.
Turn it on in clear air. Pinpointers calibrate on power-up, so switching one on inside a hole, next to your coil, or against a belt buckle teaches it that metal is the baseline. It will then either scream continuously or ignore your target completely. Power up at arm’s length from everything metal, including your detector.
Retune when it drifts. Temperature and mineralised soil both cause drift. Almost every model retunes with a button press. Do it whenever the behaviour stops making sense rather than assuming the unit is faulty.
Scan the plug first, then the hole. Lift your plug out intact, run the probe over it, and a good proportion of the time the target is right there and you never need to touch the hole at all. Then check the hole walls and floor. Then check the pile of loose soil, because targets fall out of plugs.
Use the tip, and use it in the soil. The strongest detection is at the very end of the probe. Push it gently into the loose earth and sweep the tip along the walls of the hole rather than waving the whole body around above it.
Approach from multiple directions. Signal strength tells you distance, not direction. Probing a hole from two or three angles narrows a target down far faster than probing straight down repeatedly.
Reduce the sensitivity in a tight hole. A probe running at full sensitivity in a small hole with a large target signals from everywhere and pinpoints nothing. Turning it down shrinks the detection field and sharpens the location — counterintuitive, and very effective.
Learn the “handful test”. Scoop up loose soil, hold it, and pass the probe over your hand. A signal means the target is in the handful. This sounds trivial and is the single fastest way to find small targets in disturbed dirt.
What to look for when buying
The pinpointer market is crowded and the differences that matter are few.
Waterproofing is the specification worth paying for. Even entirely inland detecting means wet holes, mud, and rain, and a probe that dies from moisture ingress is a common and avoidable failure. Fully waterproof models are widely available at modest prices. If you detect beaches at all, treat it as mandatory.
Vibration alert matters more than it sounds. In wind, near traffic, or with headphones on, an audible beep is easy to miss. A probe that buzzes in your hand works in conditions where sound does not.
Adjustable sensitivity is what lets you handle both a tiny target at depth and a large one in a small hole. Fixed-sensitivity units are workable but limiting.
A lost-alarm — a chirp after some minutes of inactivity — is a genuinely useful feature, because the classic way to lose a pinpointer is to set it down on grass. On the same theme: buy a bright colour. Orange and yellow exist for a reason, and a black probe in dark soil at dusk is a probe you will eventually leave behind.
A holster keeps it attached to you rather than on the ground. Most losses happen in the moment of putting it down.
Battery type is worth a thought. Single-cell models are simple and cheap to run; rechargeable units save money over time but need charging before you leave. Either is fine, provided you have a plan for the day it dies mid-hunt — carrying a spare cell costs nothing.
Beyond that, the established detector manufacturers all make competent probes, and the differences between them are small compared to the difference between having one and not.
Avoid the very cheapest unbranded probes. The failure modes are poor sensitivity, constant false signalling, and rapid water ingress, and a pinpointer that cannot be trusted is worse than none because you will dig believing it.
Habits that save you a pinpointer
Losing them is so common it deserves its own section.
- Keep it holstered whenever it is not in your hand. Never in a pocket, never on the grass.
- Wrist lanyard, especially on beaches and in water. Sand swallows things instantly.
- Bright colour, as above.
- Check for it before you move on, alongside checking you have filled the hole. Make it part of the same ritual.
- Turn it off. Batteries die in bags. A lost-alarm helps; discipline helps more.
If you do lose one in the field, your detector will find it — a pinpointer is a large metal object and reads unmistakably. Sweep the area you last worked before you give up on it.
It also protects your access
There is a reputational dimension to this that is easy to overlook.
Detecting’s standing with landowners and the public rests almost entirely on whether people fill their holes and leave no trace. A pinpointer is the tool that makes small, tidy recovery practical rather than aspirational — you cannot lift a neat plug, find the target quickly, and put it straight back if you are excavating blind.
That matters for keeping the permission you have, which is a great deal harder to replace than a probe. Our guide to asking for permission covers the promises that get you onto land; the pinpointer is part of how you keep them, and our guide to digging and recovery covers the rest of that workflow — plug technique by ground type, and getting the target out undamaged.
Where it fits in the kit
If you are assembling a first setup, the order that actually maximises finds is: a competent entry-level detector, a pinpointer, a proper digging tool, and headphones. Getting a better detector at the cost of any of the other three is a poor trade, and getting it at the cost of the pinpointer is the worst version of that trade.
Once you are recovering targets quickly, everything else in your logging improves too — you get the target out while the signal is fresh, so the VDI you saw, the depth and the outcome all get recorded accurately instead of approximately. That accuracy is what makes a logbook worth keeping in the first place.
Buy the orange stick. It is the cheapest large improvement available to you.
Frequently asked questions
Do I really need a pinpointer for metal detecting?
You can detect without one, but almost nobody who has used one goes back. A pinpointer cuts target recovery from minutes to seconds, dramatically reduces the size of the hole you dig, and stops you losing small targets in loose soil. If the budget is tight, a cheaper detector plus a pinpointer beats a better detector alone.
How does a pinpointer work?
It is a short-range handheld metal detector. Rather than searching ground, it tells you exactly where a target sits within the small area you have already narrowed down — inside a dug hole, in the soil plug, or in a handful of loose dirt. Most signal with a rising beep rate and a vibration as you close in.
Should I buy a waterproof pinpointer?
Yes, if the price difference is modest. Even inland detecting involves wet holes, mud and rain, and a fully waterproof probe removes a whole category of failure. If you detect beaches or wade at all, waterproofing is not optional.
Why does my pinpointer beep constantly when I turn it on?
Usually because it powered up too close to metal and calibrated itself to that. Switch it off, move it well away from your detector, coil, digging tool and any metal on your clothing, and switch it back on in clear air. Most models also let you retune by holding the button.
Keep reading
Choosing Your First Metal Detector: An Honest Buying Guide
What actually matters in a first metal detector, which specs are marketing noise, and why the accessories you skip cost you more finds than the machine you pick.
Digging and Recovery: Cut a Clean Plug, Leave No Trace
Recovery is the skill that decides whether you keep your permissions. Tools, plug technique by ground type, and how to get the target out undamaged.
The Responsible Beginner's Guide to Metal Detecting
Everything a new detectorist needs: choosing gear, getting permission, a simple hunt workflow, and the habits that turn you into a better hunter fast.