
Planning a Better Metal Detecting Hunt
Weather, soil, tides, access, and safety — plan your hunt before you leave home to waste fewer trips and dig more. A practical pre-hunt checklist.
Updated
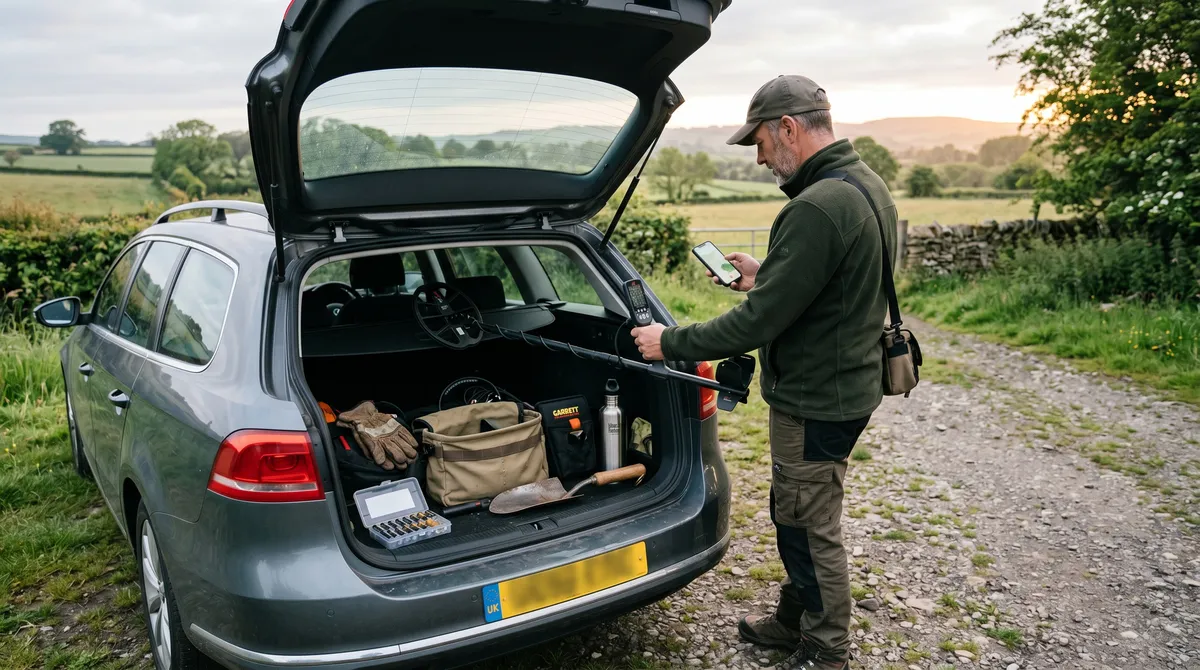
The best hunts are half-planned before you leave the house. A few minutes checking conditions, access, and gear is the difference between a productive afternoon and a long drive to locked gates, baked-hard ground, or an outgoing window you just missed. You don’t need to over-think it — you just need a routine.
Here’s a pre-hunt checklist worth running every time.
Start further back: choosing where to go
Before the checklist, there is the bigger decision, and it dwarfs everything else. No amount of preparation makes a barren site productive. Detectorists routinely optimise settings and timing on ground that was never going to produce, when an hour of research would have found somewhere better.
Site research is its own skill, and it is largely done at a desk.
Old maps are the best tool available. Historic mapping shows what a landscape used to be: buildings that have gone, tracks that have been ploughed out, fairgrounds, mills, gathering places, and field boundaries that have since been merged away. Ground that is featureless pasture today may have had a cottage on it for two centuries. Comparing a historic map against modern aerial imagery — looking for what has disappeared — is the single highest-yield research technique in the hobby.
Aerial and satellite imagery shows crop marks, soil marks, and the faint outlines of buried features, particularly in dry summers. It also shows you access, parking and boundaries before you ever ring a landowner.
Local history is under-used. Parish records, county history societies, and old newspaper archives describe where people gathered, where markets were held, where routes ran. Detectorists find things where people were, and people were not evenly distributed.
Ask about the land’s past. A landowner frequently knows things no map records — where the old barn stood, where the horses were watered, which field always turns up bits of pottery.
Then look for the edges. Field entrances, the sunny side of a hedge, the corner where two tracks met, the slope above a stream. Concentrations of activity leave concentrations of loss.
Check the ground conditions
Soil is the quiet factor that makes or breaks a hunt:
- Recent rain. Damp soil generally conducts better and can improve your depth and signal clarity. Many detectorists deliberately head out a day or two after rain.
- Dry or frozen ground. Bone-dry and frozen soil tends to read shallower and noisier, and it’s harder to dig a clean plug.
- Soil type. Heavily mineralised ground needs more attention to your detector settings — plan to spend time getting your ground balance right.
You can’t control the weather, but you can pick your days. And once you start logging soil and weather, you’ll learn which conditions actually produce at your sites.
Work with the farming calendar
On agricultural land, the single biggest constraint on when you can detect has nothing to do with weather.
Stubble and post-harvest ground is generally the most welcome window — the crop is off, the field is open, and you are not costing anyone anything.
Freshly ploughed ground turns over material that has been out of reach and is prized for exactly that reason, though it is hard walking.
Drilled and growing crops are off-limits in practice. Walking a field with a young crop in it will cost you the permission, and rightly so.
Livestock fields need a conversation each time rather than a standing yes. Lambing and calving periods are usually a firm no.
The practical consequence is that a permission is not a year-round asset — it is a set of seasonal windows. Knowing your landowner’s rotation is worth more than any gear upgrade, and asking “when suits you?” once a season is what keeps you welcome.
Time the tides (for beaches)
Beach hunting lives and dies by the tide. A low or falling tide opens up wet sand and the lower beach that’s usually underwater — often the most productive zone. Plan your trip around the tide window, not just your free time, or you’ll arrive to find the good ground submerged.
Plan for weather and safety
A hunt’s only good if you come home comfortable and safe:
- Heat and UV — detecting is hours outdoors. Sun protection, water, and avoiding the worst of the midday heat matter.
- Wind and storms — miserable at best, dangerous in open ground at worst.
- Daylight — know when the light goes, especially in winter.
These aren’t dramatic risks, but a little planning keeps a good day from turning into a rough one.
Tell someone where you are going, particularly if you are hunting alone in remote country. Route, site, and expected return time. This is standard practice for anyone working the Australian goldfields, where mobile coverage is patchy and old mine workings make an ordinary-looking paddock genuinely hazardous — but it costs nothing anywhere.
Confirm access and permission
Nothing wastes a trip like arriving somewhere you can’t actually detect. Before you go:
- Confirm your permission is current — verbal yeses can lapse. See the permission guide.
- Check any public-land rules still apply, covered in where you can detect legally.
- Note parking, gates, and access points so you’re not hunting for the entrance.
- Flag any hazards — livestock, crops, boggy ground, old wells.
Pack and test your gear
A quick gear check saves a ruined hunt:
- Charge everything the night before — detector, pinpointer, phone.
- Pack the essentials — digger, pinpointer, finds pouch, trash bag, gloves, water.
- Test the detector before you leave, not when you arrive.
- Carry spares where it counts — batteries especially.
Have a plan for the ground itself
Arriving with a plan for how you will work the site is what separates a systematic hunt from a wander.
Decide before you start which section you are covering and how. A defined block worked properly beats a whole field walked casually — most missed targets were never under the coil at all. Mark your worked lines with GPS pins if the ground has no natural features to navigate by, and note where you stopped so the next visit starts where this one ended rather than repeating it.
It is worth deciding your dig policy in advance too. Digging everything is the right call on new ground; being selective is reasonable on a site whose trash signature you already know. Choosing in the car park rather than drifting into it at hour three keeps the hunt comparable with your previous ones.
Beaches need their own plan
If you’re heading for the coast, the planning inputs change completely: tide state matters more than weather, spring lows expose ground that neap tides never uncover, and a beach after a storm is effectively a different site to the same beach in calm conditions. Our guide to beach metal detecting covers reading tides and sand zones, and why salt water forces a different set of detector settings.
That storm point deserves emphasis, because it is the closest thing to a reliable edge in the hobby: heavy weather strips sand and exposes years of accumulated material, and the window before the sand returns is short. Reading a beach after a storm covers what to look for and when to go.
Let past hunts plan future ones
This is where a log earns its keep. Before heading out, glance back at what’s produced before — which site, which conditions, which corner. Your own history is the best planning tool you’ve got. The ground that gave up keepers after rain last month is a strong bet for the same conditions this month.
We’re building toward richer planning in DetectingLog — weather and soil logging today, with hunt-planning features on the roadmap — all aimed at one thing: fewer wasted trips and better timing. Pair it with your stats and you stop guessing where and when to go.
Frequently asked questions
What is the best weather for metal detecting?
Soil moisture is the big one — ground that's damp after recent rain often gives better depth and cleaner signals than bone-dry or frozen soil. Beyond that, plan around comfort and safety: avoid extreme heat, high UV, and storms, and make the most of available daylight.
How do I plan a metal detecting trip?
Check recent rain and soil conditions, confirm access and permission, check tides if you're hunting a beach, pack and test your gear, and note any hazards or parking. Reviewing your past hunts at the site helps you pick the timing and spot most likely to produce.
How do I research a new site before detecting it?
Old maps are the single best tool. Historic maps show buildings, tracks, fairgrounds and gatherings that have since vanished, and comparing them against modern aerial imagery points you at ground that saw activity but is now open field. Add local history records and aerial photography for crop and soil marks.
Does soil moisture affect metal detecting?
Yes. Moist soil conducts better and can improve target depth and signal clarity, which is why many detectorists head out after rain. Very dry or frozen ground tends to read shallower and noisier. Logging soil and weather lets you confirm what works at your sites.
Keep reading
Metal Detecting the Australian Goldfields: A Field Guide
Where Australia's gold country is, why nugget hunting needs different gear and technique, how to read old diggings, and the safety that actually matters out there.
Beach Detecting After a Storm: Reading Sand Movement
Storms strip sand and expose years of lost jewellery. Here is how to read cuts, scallops and black sand, when to go, and how to work a scoured beach safely.
Beach Metal Detecting: Tides, Salt, and Settings
Beaches hide gold but punish the unprepared. How to read tides and sand zones, stop salt from wrecking your signals, and protect your gear from corrosion.